

How to Choose Foundation for Textured Skin: 2026 Guide
Table of Contents
- Why Foundation Settles Into Texture (and How to Stop It)
- The Best Primer for Smoothing Skin Texture: What to Look For
- Ingredients That Help Textured Skin Foundation Perform
- How to Prep Skin for Textured Skin Foundation
- Makeup Application Techniques for Skin Texture
- Choosing the Right Finish and Coverage for Your Texture Type
- Frequently Asked Questions
Last Updated: September 16, 2026
Why Foundation Settles Into Texture (and How to Stop It)
Foundation settles into texture because liquid and cream formulas migrate into every dip, pore, and fine line, then dry there. The fix is not a heavier formula but a different order of operations: prep the surface, blur the texture, then apply thin layers with the right tool.
The Best Primer for Smoothing Skin Texture: What to Look For
The best primer for smoothing skin texture fills unevenness without pilling, and your texture type determines which you need. Silicone-based primers create the smoothest surface for enlarged pores and acne scarring; hydrating primers suit dry, flaky, or mature skin where fine lines are the main concern.
Pore-Blurring vs. Hydrating Primers
Pore-blurring primers rely on silicone or dimethicone to create a smooth film over textured areas, and work best on the T-zone, nose, and cheeks. Apply them only to textured zones, not the whole face, or the finish turns flat and mask-like.
Ingredients That Help Textured Skin Foundation Perform
Ingredients that help textured skin foundation perform fall into two groups: surface-smoothing ingredients in the formula, and barrier-supporting ingredients that improve the skin underneath. Hyaluronic acid and ceramides in your prep bind moisture so the surface stays plump and foundation glides; in the foundation itself, light-reflecting particles diffuse uneven texture rather than covering it.
Ingredients to Avoid
Alcohol-heavy formulas and heavy fragrance are the two most common culprits behind foundation that looks cakey by midday. Denatured alcohol strips the barrier, making dry patches flake and grab pigment unevenly; fragrance can irritate sensitive or acne-prone skin and trigger congestion.
How to Prep Skin for Textured Skin Foundation
Most prep advice stops at "cleanse, moisturize, prime," which does not explain why prep fails. On textured skin, it fails for one reason: layering incompatibility. When a water-based serum sits under a silicone-based primer under a silicone-based foundation, the layers do not bond, they slip, ball up, and pill. Pilling is the biggest cause of texture that looks worse after makeup than before it.
The Prep Sequence That Prevents Pilling
- Cleanse gently. Use a non-stripping cleanser, no sulfates if your skin is dry or reactive. A stripped barrier flakes within hours and grabs pigment unevenly.
- Exfoliate once or twice a week, not daily. Chemical exfoliants (lactic or mandelic acid for dry skin, salicylic for oily or acne-prone) are gentler than physical scrubs, which aggravate breakouts and micro-tear the surface. Over-exfoliating causes the exact flaking people try to conceal.
- Apply a hydrating serum and wait 60 seconds. Hyaluronic acid draws moisture into the surface layers and plumps fine lines so foundation glides instead of catching. Serum applied wet under primer is a pilling trigger.
- Moisturize and wait two full minutes. This is the step people rush. Moisturizer needs to absorb, not sit on the surface. If your skin still feels tacky, wait longer.
- Apply sunscreen and wait again. Sunscreen is the most common pilling culprit because many formulas use film-formers that do not play well with silicone primers. Give it a full two minutes to set before primer. If you consistently pill here, switch to a sunscreen with the same base ingredients as your primer (silicone-based SPF under silicone primer, water-based under water-based).
- Prime only the textured zones. Pores, fine lines, old acne marks. Primer across the whole face flattens the finish and adds another layer that can pill.
- Let primer set for 60 seconds before foundation touches your face. It should feel tacky, not slippery, slippery primer has not set, and foundation will slide off it.
Prep Differs by Texture Type
The sequence above is the baseline; these adjustments are where prep gets specific.
- Acne-related texture: do not scrub active breakouts. Use a salicylic acid treatment at night, not right before makeup. In the morning, cleanse, apply a light gel moisturizer, and prime only around, not on, active lesions; primer directly on a healing blemish traps bacteria and can prolong it.
- Dry patches and flaking: skip physical exfoliation on flaking days. Apply a hydrating serum, then a ceramide-rich moisturizer, then a thin layer of facial oil on the driest patches only. Let it absorb fully, foundation over unabsorbed oil separates within an hour.
- Enlarged pores: a morning niacinamide serum helps regulate sebum over time, reducing how much pores read. It is not instant, but it changes the surface itself rather than just covering it.
- Mature texture: layer a peptide or ceramide serum under moisturizer. Mature skin loses moisture faster, and a plump surface keeps foundation out of fine lines.
The Two-Minute Rule
If you take one thing from this section: every layer needs time to set before the next one goes on. Serum, moisturizer, sunscreen, primer, each needs roughly 60 to 120 seconds. Rushing causes pilling, and pilling makes textured skin look worse with makeup than without it.
Makeup Application Techniques for Skin Texture
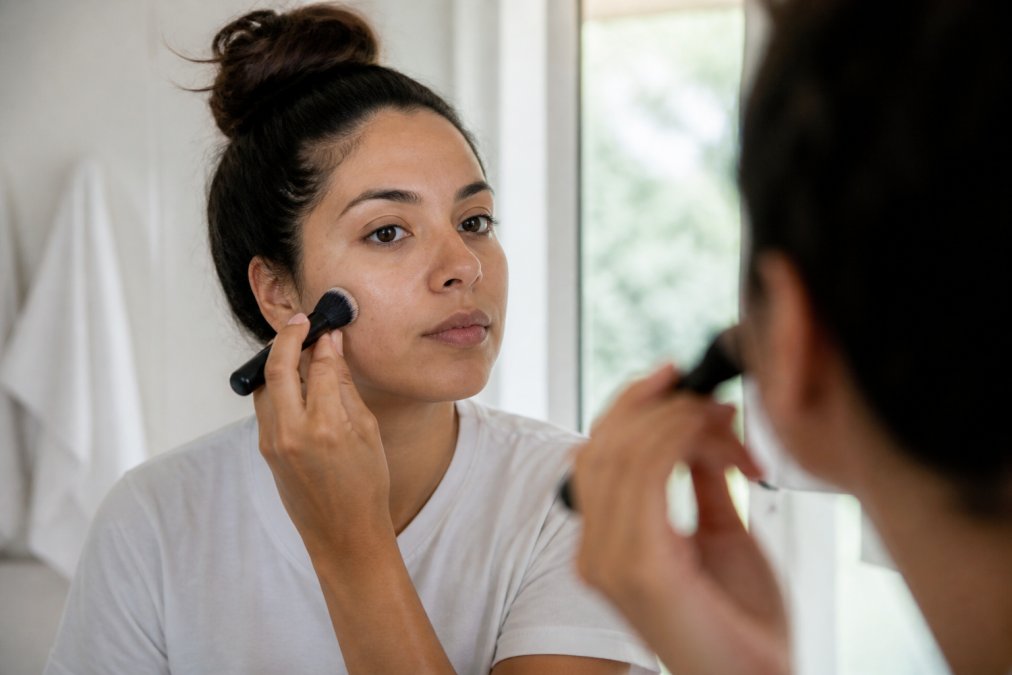
Makeup application techniques for skin texture come down to one principle: thin layers, pressed in, built up only where needed. Thick layers sink into texture and dry there; thin layers sit on the surface and blur.
Jouer Soft Focus Hydrate & Setting →
Tool-Specific Techniques for a Smooth Finish
Different tools produce different finishes on textured skin; the tool matters as much as the formula.
| Tool | Best For | Technique | Finish |
|---|---|---|---|
| Dense kabuki brush | Large areas, buffing | Press and roll, do not sweep | Airbrushed, blurred |
| Damp beauty sponge | Sensitive or acne-prone skin | Bounce, never drag | Sheer, natural |
| Flat synthetic brush | Around nose, under eyes | Tap and stipple | Buildable, precise |
| Fingertips | Small touch-ups | Pat gently | Melted, skin-like |
Choosing the Right Finish and Coverage for Your Texture Type
Finish and coverage are two separate decisions most guides collapse into one. Finish controls how light bounces off your skin; coverage controls how much pigment sits on top. On textured skin, the wrong finish makes texture louder even when coverage is light, and the wrong coverage makes it look flat even when the finish is right.
Match the Formula to the Texture, Not the Trend
- Enlarged pores (oily T-zone, visible openings): matte or soft-matte finish, oil-controlling formula, buildable medium coverage. Matte finishes reduce the specular highlight that makes pore openings read as deep. A dewy finish on enlarged pores acts like a magnifying glass.
- Acne-related texture (active breakouts, post-inflammatory marks, shallow indentations): velveteen or natural finish, non-comedogenic, medium buildable coverage. Heavy full-coverage formulas cling to dry edges of healing blemishes and cake around each one, build in thin layers and spot-conceal instead.
- Dry patches and flaking (dehydration, winter skin, retinoid use): satin or luminous finish, hydrating formula with ceramides or glycerin, sheer to light coverage. Matte formulas set instantly on dry patches and grab pigment unevenly, producing the "cracked" look by midday.
- Fine lines and mature texture (creases around eyes, mouth, forehead): satin finish, lightweight flexible formula, sheer to light coverage. Skip "24-hour matte" or "transfer-proof" formulas, they set hard and settle into every crease within an hour.
- Combination texture (oily T-zone plus dry cheeks): satin finish, light layers everywhere, powder only where you shine. One formula rarely serves both zones; use two if needed.
Lighting Changes Which Finish Looks Smooth
This is the part almost no guide covers, and it explains why a foundation that looks flawless in your bathroom mirror looks rough in a meeting room.

- Natural daylight (window light, outdoor): the most honest light. It reveals texture and pigment mismatch. If your foundation looks smooth here, it will look smooth almost anywhere. Test new foundations in daylight before committing.
- Warm indoor lighting (incandescent, warm LED): softens texture and warms your foundation by roughly half a shade. Matte finishes can look flat and mask-like here because there is no highlight to give skin dimension.
- Cool indoor lighting (fluorescent, office overheads): exaggerates cool undertones and makes matte finishes look chalky. Under fluorescents, a satin finish reads more skin-like than full matte.
- Ring lights and phone flashes: flatten texture but also flatten contour, so a foundation that looks great on camera can look one-dimensional in person. Do not calibrate your everyday foundation to a ring light.
Coverage Is a Layering Decision, Not a Label
"Full coverage" on the bottle does not mean full coverage on your face, it means the formula is pigmented enough to reach it if you apply enough. On textured skin, you almost never want to.
Build in three passes:
- First pass, sheer, all over. A pea-sized amount pressed into the center of the face and blended outward, evening tone without filling texture.
- Second pass, medium, targeted. Add product only where you need more: redness around the nose, post-acne marks, uneven areas. Leave the rest alone.
- Third pass, spot conceal only. Use a small brush and pinpoint concealer on individual blemishes or dark marks to get the coverage you want without the mask effect.
Frequently Asked Questions
Why does my skin look so textured with foundation?
Foundation settles into texture when it is too thick, too matte, or applied over dry or uneven skin. Dead skin cells, dehydration, and excess oil all create ridges that makeup catches on. Using a lightweight, buildable formula over well-prepped skin with a hydrating primer reduces settling. Exfoliating once or twice a week and moisturizing before application also helps foundation sit smoothly instead of emphasizing fine lines and pores.
Is dewy or matte better for textured skin?
Neither is universally better, but the finish should match your skin type. Dewy finishes with light-reflecting particles soften the look of texture and work well for dry or mature skin. Matte finishes control shine and suit oily or acne-prone skin, but a heavy matte formula can emphasize flakes and fine lines. A satin or velveteen finish often balances both, giving a natural look without highlighting bumps or shine.
What ingredients should I avoid if I have textured skin?
Avoid heavy oils, thick silicones that pill, and drying alcohols that strip the skin barrier. These can clog pores, cause flaking, or make foundation slide and settle. Instead, look for non-comedogenic formulas with hyaluronic acid, ceramides, and niacinamide to support hydration and oil balance. Dermatologist-tested and fragrance-free options are safer for acne-prone or sensitive skin.
Can professional-grade brushes help minimize the appearance of texture?
Yes. Dense, synthetic brushes with soft, high-density bristles buff foundation into the skin rather than sitting on top of it. A kabuki or buffing brush blends product evenly, reducing streaks and caking. Pairing the right brush with a stippling or pressing motion, instead of dragging, helps foundation melt into texture for a smoother, airbrushed finish.