

Makeup Tips for Hooded Eyes Over 50: A 2026 Guide
Table of Contents
- Understanding Hooded Eyes After 50: Why Placement Changes Everything
- Prep the Upper Lid: Primer, Eye Creams, and Texture Control
- Best Eyeshadow for Crepey Eyelids: Creams, Satins, and Soft Focus Formulas
- Eyeliner Techniques for Hooded Eyes That Won't Smudge or Transfer
- Makeup Mistakes for Hooded Eyes That Age You (and What to Do Instead)
- Tools, Lighting, and Sensitivity: What Most Tutorials Skip
- Frequently Asked Questions
Last Updated: September 26, 2026
Understanding Hooded Eyes After 50: Why Placement Changes Everything
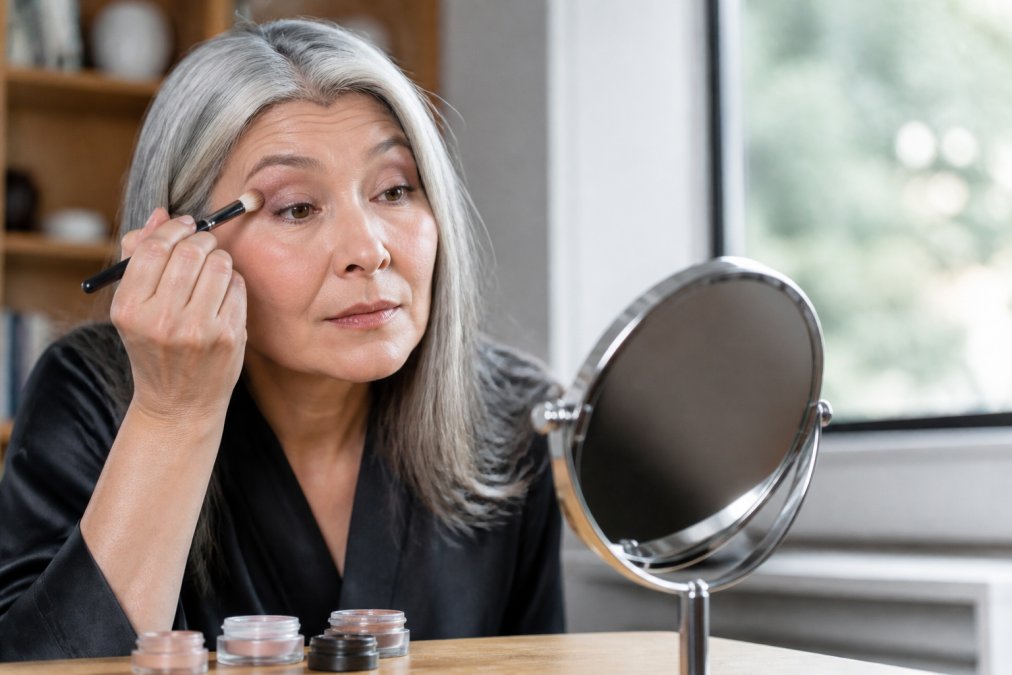
Makeup tips for hooded eyes over 50 start with one truth: the lid space you had at 30 is not the lid space you have now. A hooded eye has a fold of skin that drops over the crease, hiding most of the mobile lid. After 50, that fold often sits lower, and the skin around it gets thinner and looser.
How Mature Skin and Crepey Eyelids Change the Canvas
Crepey eyelids are lids where the skin has lost collagen and elastin, giving it a thin, crinkled texture. That texture changes how makeup sits. Powder settles into every fine line. Shimmer catches light on the crinkles instead of the lid.
Prep the Upper Lid: Primer, Eye Creams, and Texture Control
Prep decides whether your shadow lasts two hours or eight. Start with a hydrating eye cream and let it absorb fully before anything else touches the lid.
Then follow this order:
- Cleanse and pat the eye area dry
- Apply eye cream, wait two minutes
- Tap on a thin eye primer to grip color
- Set only the crease with a whisper of translucent powder
Best Eyeshadow for Crepey Eyelids: Creams, Satins, and Soft Focus Formulas
The best eyeshadow for crepey eyelids is a cream or satin formula in a neutral tone, not a powder and not a glitter. Creams melt into the skin and skip the settling problem. Satins give a soft focus finish that blurs texture instead of highlighting it.
| Finish | Best For | Avoid If |
|---|---|---|
| Cream | Dry, crepey lids | Lids get oily by noon |
| Satin | Most mature lids | You want full glam |
| Matte | Hooded, oily lids | Lids feel tight or dry |
| Shimmer | Rarely, on the brow bone | Lids have visible creasing |
Placement Rules for Eyeshadow on a Hooded Eye Shape
Placement is where hooded eyes are won or lost. Apply color with your eyes open, not closed. That way you can see exactly where the hood covers your work.
Follow these steps:
- Sweep a transition shade just above the crease, where the hood begins
- Keep the darkest color on the outer corner, blended upward
- Place a light satin shade on the brow bone for lift
- Skip the mobile lid entirely if the hood fully covers it
Eyeliner Techniques for Hooded Eyes That Won't Smudge or Transfer
Eyeliner on a hooded eye fails for a mechanical reason, not a skill reason. When the hood drops over the crease, the upper lid skin physically touches the lash line every time you blink. Any liner that stays tacky or sits on top of the skin gets pressed upward and smears into the crease within an hour. That is why the same pencil that works on a visible lid transfers on a hooded one.
Tightlining: Put the Color Inside the Lash Line
Tightlining means depositing color into the upper waterline and the gaps between individual lashes, rather than drawing a line above them. It defines the eye without consuming visible lid space, critical when the hood already covers most of your mobile lid.
How to do it on a mature lid:
- Look slightly down into a mirror angled below eye level so the upper waterline is exposed.
- Use a small, flat synthetic brush or a fine-point gel pencil, not a soft kohl, which drags on thinner skin.
- Press color into the lash roots in short strokes, working from the outer corner inward.
- Stop about two-thirds of the way to the inner corner. Going all the way in can make eyes look red or watery.
- Blink once, then check for transfer onto the hood before you add shadow.
The Thin Upper Line: Where to Place It
If you want a visible line, keep it thin and place it as close to the lashes as possible. A common pattern among makeup artists working with mature clients is a line that starts almost invisible at the inner corner and thickens only at the outer third, then gets smudged with a small pencil brush before it sets.
What to avoid:
- A thick line across the whole lid. It eats the sliver of visible lid you have and makes the eye read smaller.
- A wing that points down. Follow the natural angle of your lower lash line outward and slightly up; a downward flick drags the whole eye.
- Lining the entire lower lash line. It pulls the eye downward and makes a droopy lid look heavier. If you want lower definition, stop two-thirds of the way in and smudge.
Format and Formula: What Actually Holds
Long-wear and waterproof formulas are the default recommendation for hooded lids because they resist the blink-transfer problem. But there is a trade-off most guides skip: the same polymers that make a liner budge-proof also make it harder to remove, and repeated rubbing at the lash line is a common trigger for irritation in women over 50, whose eyelid skin is thinner and less oily than it was a decade earlier.
A practical middle path:
- Gel pencil or cream liner for the upper lash line, long-wear but easier to remove than a liquid waterproof pen.
- Powder shadow pressed into the lash line with a small angled brush for a softer, lower-risk option if your eyes are sensitive.
- Skip waterproof on the lower lash line entirely unless you have a specific event; the removal friction is not worth it for daily wear.
The Transfer Check
Before you finish your eye makeup, do a transfer check: look straight ahead in a front-facing mirror and blink normally five or six times. If you see color sitting on the hood, you have two options, remove and reapply thinner, or set the line with a matching matte shadow pressed on top with a small brush. Setting is the faster fix and adds a few hours of wear.
Makeup Mistakes for Hooded Eyes That Age You (and What to Do Instead)
Makeup mistakes for hooded eyes usually come from copying tutorials built for visible lids. Here are the ones that cost you the most:
- Dark shadow all over the lid. It disappears under the hood and leaves a shadow that reads as a bruise. Instead, keep dark tones on the outer corner.
- Glitter or heavy frost. It highlights crepey texture. Switch to satin.
- Harsh black liner on the waterline. It shrinks the eye. Use a soft brown or tightline instead.
- Unblended edges. Hard lines look severe on mature skin. Blend with a small, soft brush.
- Skipping the brow. A lifted brow bone opens the eye. A flat brow closes it.
Tools, Lighting, and Sensitivity: What Most Tutorials Skip
Most hooded-eye guides stop at "use a small brush." That is not enough. The tool shapes, the light you apply in, and the ingredients in your products all change the result on a mature, hooded lid, and almost no ranking article connects them.
Brush Shapes That Actually Fit a Hooded Lid
A hooded eye has a narrow, curved workspace. A fluffy blending brush is wider than the space it is meant to work in, so it scatters color onto the brow bone and the outer corner at once. The shapes that work are small and directional:
- Small tapered blending brush, for placing and softening the transition shade just above the crease, where the hood begins.
- Flat shader with a short, dense head, for pressing cream or satin shadow onto the small visible strip of lid without dragging.
- Small pencil brush, for smudging liner and for placing dark color precisely on the outer corner.
- Angled liner brush, for pressing powder shadow into the lash line as a soft alternative to pencil.
- Small synthetic flat brush, for tightlining with gel or cream.
Lighting: Apply in the Light You Will Be Seen In
This is the single most under-covered variable in hooded-eye makeup. Overhead light casts a shadow directly into the hood, making eyes look more tired than they are, and it hides placement errors you would catch in front-facing light. Front-facing light shows the true shape of the eye and the true edge of your blend.
A practical routine:
- Daytime / office: apply facing a window or a front-lit mirror. Keep the look soft and the liner thin, because daylight is unforgiving on hard edges.
- Evening / event: overhead and side lighting will deepen the hood shadow. Compensate by placing your lightest satin shade slightly higher on the brow bone and keeping the outer-corner dark tone tighter, so the lift reads under low light.
- Photography: front flash flattens texture and can make shimmer read as a bright patch. If you know you will be photographed, favor satin over shimmer and keep the brow-bone highlight subtle.
Ingredients: The Gap Most Guides Ignore
Technique masks hooding. Ingredients change the skin underneath it. This is where a mature-eye routine can do more than any placement trick.
- Peptides, commonly used in eye creams to support the look of firmness over time.
- Hyaluronic acid, draws in water to plump the look of fine lines, which makes shadow sit more smoothly on crepey lids.
- Niacinamide, often included for tone and barrier support around the delicate eye area.
- Ceramides, help support the skin barrier, which matters more as oil production drops after menopause.
Sensitivity: A Real Consideration After 50
Eyelid skin is among the thinnest on the body, and it thins further with age. That makes irritation from long-wear, waterproof, and heavily fragranced eye products more likely than it was in your thirties.
Practical steps:
- Patch test any new eye product on your inner forearm for 24 hours.
- Choose fragrance-free and hypoallergenic formulas where possible.
- Remove long-wear eye makeup with a gentle oil-based remover and let it sit for a few seconds before wiping, do not scrub.
- If your eyes water, sting, or look red after a new product, stop using it and give the area a few days to settle.
Putting It Together
The tools decide precision, the light decides accuracy, and the ingredients decide how the skin behaves under the makeup. Get all three right and the technique sections above will hold up for a full day instead of an hour.
Frequently Asked Questions
What is the number one trick for hooded eyes?
Apply eyeshadow with your eyes open and look straight ahead. For hooded eyes, the crease disappears when the eye is open, so placing a transition shade slightly above the natural crease makes it visible. Keep the darkest color on the outer third and blend upward toward the brow bone. This open-eye technique prevents the color from vanishing under the hood and keeps the lifted effect intact all day.
What is the best eyeshadow for crepey eyelids over 50?
Cream and satin formulas with soft focus pigments work best on crepey eyelids because they glide over fine lines instead of settling into them. Look for hydrating ingredients and long-wear claims, and avoid heavy matte powders that can look chalky on mature skin. A thin layer of primer underneath helps the color stay put. For extra firmness around the eye area, an eye cream with hyaluronic acid, like the RevitaLift Eye Cream, can be used before makeup.
How do you apply eyeliner to hooded eyes without it smudging?
Tightline the upper lash line with a waterproof pencil, then add a thin line that gets slightly thicker toward the outer corner. Skip a thick line across the entire lid, which eats visible lid space. Set the liner with a matching matte shadow and avoid lining the lower lash line all the way across. Waterproof, smudge-proof formulas hold up best when the upper lid rests against the lash line.
What should you avoid doing with hooded eyes?
Avoid heavy shimmer across the entire upper lid, thick black liner along the whole lash line, and dark shadow packed into the crease. These techniques draw attention downward and make the eye look smaller. Also skip harsh under-eye concealer that creases. Instead, use neutral tones, a brow bone highlight, and a soft transition shade above the crease to lift and open the eye area.
Hooded eyes after 50 ask for a different approach, not more effort. The right prep, the right textures, and placement built around your actual lid shape do the heavy lifting.
Cosmetikly can help you get there. Our professional-grade makeup tools and accessories are built for precision, our formulas are vegan and cruelty-free, and every order over $99 ships free. Explore the collection and find the tools that make your routine faster and your results sharper.