

How to Store Makeup Brushes in Small Spaces
Table of Contents
- Why Smart Makeup Brush Storage Matters in Small Spaces
- Makeup Brush Organizer for Small Spaces: Types That Save Room
- How to Organize Makeup Brushes in a Drawer
- Makeup Brush Storage for Travel: Keeping Brushes Safe on the Go
- How to Keep Makeup Brushes Clean While Stored
- Common Mistakes When Storing Makeup Brushes in Tight Spaces
- Conclusion: Build a Storage System That Fits Your Space
- Frequently Asked Questions
Last Updated: October 9, 2026
Why Smart Makeup Brush Storage Matters in Small Spaces
Tight on counter space? You are not alone. A common frustration we hear at Cosmetikly is that a full brush collection simply will not fit on a small vanity.
Here is the part most guides skip. Storage is not just about tidiness.
The good news: small-space storage works better than a big open jar. A compact, covered setup keeps brushes clean and upright in less room than you think.
Below, we break down the best organizers, drawer setups, travel options, and cleaning habits for tight spaces. We also flag the mistakes that quietly ruin brushes.
Makeup Brush Organizer for Small Spaces: Types That Save Room
The best makeup brush organizer for small spaces is one that uses vertical height instead of floor space. A rotating or upright stand holds more brushes in less room than a flat tray.

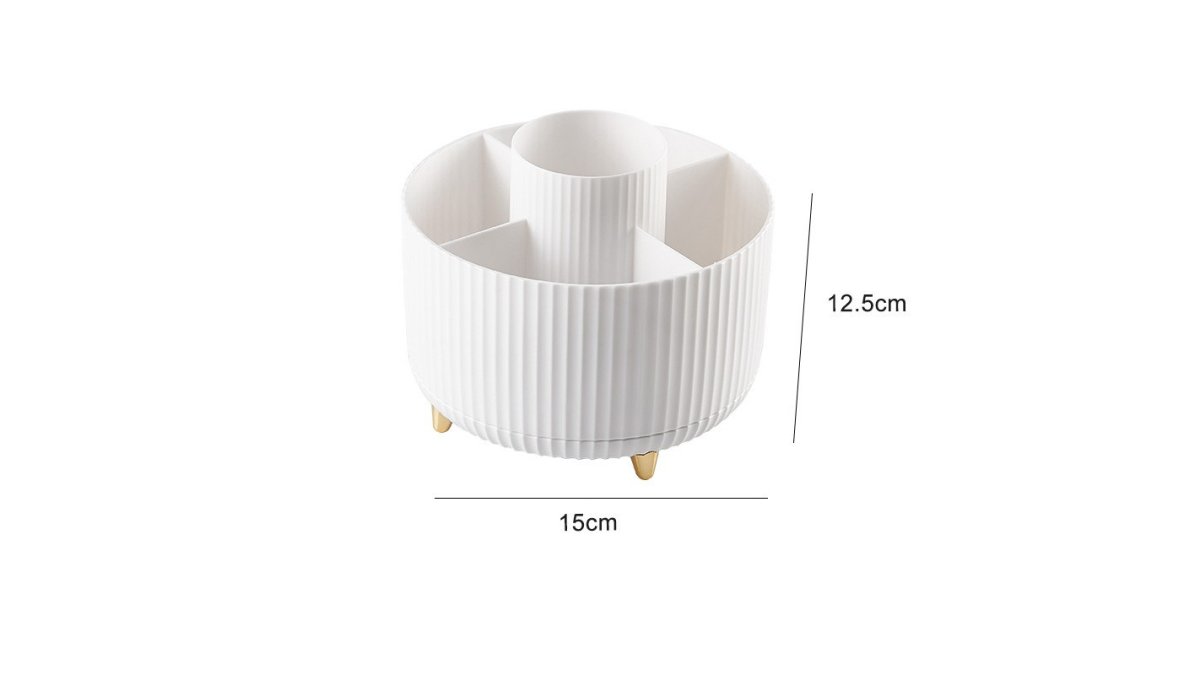
Two styles do this best. Rotating organizers spin so you can reach any brush without digging. Vertical stands hold brushes upright and take up only a few inches of counter.
Rotating and Swivel Organizers
A rotating organizer spins 360 degrees, so you grab the brush you need in one motion. This is our pick for anyone with a crowded vanity.
The Rotating Desktop Makeup Brush Organizer has a 360-degree swivel and multiple compartments for brushes, lipsticks, and small tools. It keeps everything visible and saves counter space.
Prefer more color options? The Swivel Cosmetic Brush Organizer comes in Pink, Blue, and White, with lid and no-lid choices. It is lightweight and easy to move.

Vertical and Silicone Stands
A vertical stand holds brushes upright so bristles never bend. This protects brush shape over time.
The Vertical Makeup Brush Organizer uses multiple compartments and a soft handle. Its vertical design saves counter space and keeps brushes standing tall.

For a minimalist look, the Silicone Desk Makeup Brush Stand is dustproof and stable. It comes in Pink, Green, and Purple, and weighs just 0.1 kg.
| Organizer | Best For | Key Feature | Price |
|---|---|---|---|
| Rotating Desktop Organizer | Crowded vanities | 360-degree swivel | $40.00 |
| Swivel Cosmetic Organizer | Color matching | Lid or no-lid options | $48.00 |
| Vertical Organizer | Protecting brush shape | Multiple compartments | $38.00 |
| Silicone Desk Stand | Minimalist setups | Dustproof, lightweight | $32.00 |
How to Organize Makeup Brushes in a Drawer
Drawer storage works best when brushes lie flat, stay separated, and never sit on top of each other. Flat storage protects bristle shape, hides clutter behind a closed front, and frees your counter entirely, which is the whole point in a small space.
Before you buy anything, measure. Standard vanity drawers run about 3 to 5 inches deep, and most brush heads are 1.5 to 2.5 inches wide at the ferrule. If your drawer is under 3 inches deep, skip upright inserts and use a flat tray instead. Forcing a lid onto standing bristles flattens them permanently.
Pick the Right Insert
Three insert types cover almost every small drawer:
- Adjustable dividers. Spring-loaded or adhesive strips you reposition as your collection changes. Best for shallow drawers and odd sizes.
- Acrylic or plastic tray inserts. Rigid compartments that hold shape and wipe clean. Look for ones with at least 1 inch of clearance per brush.
- Fabric roll-up mats. Soft, flexible, and travel-friendly. Unroll flat in the drawer, roll up when you need to move.
A common mistake is tossing brushes in loose. They tangle, bristles bend, and powder dust migrates onto every handle. Dividers fix this for a few dollars.
A Five-Minute Setup
- Empty the drawer and wipe it with a damp cloth. Let it dry completely, residual moisture is a mildew risk.
- Measure the interior depth and width.
- Add a shallow insert or adjustable dividers sized to the drawer.
- Lay brushes flat, heads pointing the same direction, with a finger-width gap between each.
- Group by use: face brushes on one side, eye and lip brushes on the other.
- Close the drawer slowly the first time to confirm nothing is pinched.
Drying and Mildew Prevention in Drawers
A closed drawer traps humidity. If you wash brushes and return them before they are fully dry, you create the exact conditions mildew needs: darkness, stillness, and moisture.
A common pattern is to keep a small desiccant packet (the silica kind that ships in shoe boxes) tucked in a corner of the drawer. Replace it every few months or when the indicator beads change color.
Wipe the drawer liner weekly. Powder, skin cells, and product residue build up faster than most people expect, and a clean liner keeps brushes cleaner between washes.
Makeup Brush Storage for Travel: Keeping Brushes Safe on the Go
Travel storage comes down to one rule: keep bristles covered, separated, and fully dry before anything gets zipped. A soft case or a compact stand does all three. What most guides skip is the drying check and the mildew math, and that is where brushes actually get ruined on trips.
Rotating Desktop Makeup Brush Organizer →
Choose the Right Case
- Roll-up brush mats. Fabric sleeves that fold around each brush. Lightweight, flexible, and easy to squeeze into a carry-on.
- Hard-shell brush cases. Rigid outer shell with individual slots. Best for checked bags or anywhere brushes get crushed.
- Stand-and-travel organizers. A vertical stand with a soft handle that doubles as a case. Keeps brushes upright in the hotel bathroom and protected in transit.
For short trips, the stand-and-travel option is the most efficient, one item does storage and display. For longer trips or checked luggage, a hard-shell case wins on protection.
The Drying Check Before You Pack
Do not pack damp brushes. Moisture trapped in a closed bag is how mildew starts, and a musty brush is very hard to rescue. Before packing, run this check:
- Press the bristles against a clean tissue. If any moisture transfers, it is not dry.
- Touch the bristles to your cheek. If they feel cool, wait another hour.
- Confirm the ferrule (the metal band) is dry too. Water hides there longer than in the bristles.
A brush that passes all three is safe to pack.
Packing Steps That Protect Shape
- Let brushes dry fully, bristle-side down or flat, never upright.
- Slide each brush into its own slot or sleeve. Do not bundle them.
- Pack the case bristle-side up so gravity does not press the heads into the fabric.
- Keep the case out of crushing range, top of the bag, not the bottom under shoes.
- If you are flying, keep the case in your carry-on. Pressurized cargo holds and extreme temperature swings are hard on glue and bristles.
On the Road: Storage and Quick Care
In a hotel or shared bathroom, keep brushes upright in the stand or propped in a clean cup. Do not lay them on the sink rim, that is where water pools and where shared surfaces carry the most residue.
If you wash brushes mid-trip, use the same routine as at home: warm water, gentle soap, rinse until clear, squeeze in a towel, reshape, and air-dry bristle-side down.
When to Replace a Travel Brush
Travel is hard on brushes. Replace any brush that shows these signs:
- Bristles shed every time you use it.
- The head is splayed and will not reshape after washing.
- The ferrule feels loose or wobbly.
- A musty smell returns after a wash and full dry.
A reasonable schedule is to inspect travel brushes before every trip and replace any that fail the check. For everyday brushes, most people find that a quality brush lasts one to three years with regular washing, but travel brushes, which get compressed and exposed to temperature swings, often need replacing sooner.
How to Keep Makeup Brushes Clean While Stored
Clean brushes stay clean longer when storage does half the work. A covered or upright setup keeps dust and stray powder off the bristles between washes.
You still need to wash them. Here is a quick routine that fits a busy morning:
- Wet the bristles with warm water, keeping the handle dry.
- Add a small amount of gentle soap or brush cleanser.
- Massage the bristles in your palm to release makeup residue.
- Rinse until the water runs clear.
- Squeeze out excess liquid with a clean towel.
- Reshape the bristles and air-dry bristle-side down.
Drying matters as much as washing. Lay brushes flat or angle them down so water drains away from the handle. Standing them upright to dry lets water seep into the glue and loosen the bristles.
Once dry, return brushes to their upright stand or covered drawer. The U.S.
Common Mistakes When Storing Makeup Brushes in Tight Spaces
Most storage problems come from a handful of habits. Fix these and your brushes last longer.
- Storing brushes bristle-down. This bends the shape and traps dust. Store them upright or flat.
- Cramming too many in one cup. Bristles crush against each other. Leave breathing room.
- Skipping the cover. Open storage collects dust fast in a small room.
- Packing damp brushes. This invites mildew. Always dry first.
- Never replacing worn brushes. Shedding, splayed bristles, and a scratchy feel mean it is time for a new one.
- Ignoring a musty smell. That smell means bacteria or mildew. Wash and dry the brush, or replace it.
A quick weekly check keeps small problems from growing. Wipe the organizer, toss any brush that has lost its shape, and rotate in a clean one.
Conclusion: Build a Storage System That Fits Your Space
Small spaces reward smart systems, not more stuff. Pick one organizer that fits your counter or drawer, keep brushes upright and covered, and wash them on a regular schedule.
At Cosmetikly, we build tools for exactly this. Our rotating and vertical organizers save space while protecting your brushes. Every product is dermatologist-approved and cruelty-free. You also get a 30-day trial and free delivery on orders over $99.
Explore our premium makeup tools and accessories and build a setup that keeps your brushes clean, upright, and ready to use.
Frequently Asked Questions
How should you store makeup brushes in a small space?
Store makeup brushes in a small space by using a compact organizer that keeps them upright and separated. A rotating desktop organizer or a vertical stand takes up minimal counter space while keeping brushes accessible. If you are short on counter room, use a drawer with dividers or a silicone stand that fits into a corner. Always store brushes with the bristles pointing up or laid flat to prevent bending and moisture buildup.
Is it better to store makeup brushes upright or lying down?
Upright storage works best for keeping brush shape and saving space. A vertical organizer or a cup-style holder lets bristles stay fluffy and prevents them from resting on surfaces where they can pick up dust. Lying brushes flat is fine for travel if you use a case with individual slots. Avoid storing brushes bristle-down in a container, because trapped moisture can encourage mildew and damage the glue holding the bristles.
How do you keep makeup brushes clean while storing them?
Keep brushes clean while stored by washing them every one to two weeks with a gentle soap or brush cleanser, rinsing until the water runs clear, and air-drying them completely before putting them back. Store them in a dustproof organizer or a drawer with a liner to limit exposure to makeup residue and dust. If you use a rotating or vertical organizer, wipe the compartments monthly to prevent buildup.
What can you use to organize makeup brushes without a vanity?
You do not need a vanity to keep brushes organized. A rotating desktop organizer, a silicone stand, or a vertical storage bag can sit on a shelf, windowsill, or bathroom counter. For drawer storage, use small dividers or a cutlery tray to keep brushes separated. A hanging toiletry bag with elastic loops also works for tight bathroom spaces and doubles as travel storage.