

How to Clean Makeup Brushes Step by Step
Table of Contents
- Why You Need to Clean Your Makeup Brushes Regularly
- How Often to Wash Makeup Brushes for Optimal Hygiene
- What You'll Need to Clean Makeup Brushes
- Step-by-Step Cleaning Process for Makeup Brushes
- Best Makeup Brush Cleaner Options and Tools
- How to Dry Makeup Brushes Properly
- Common Mistakes to Avoid When Cleaning Brushes
- When to Replace Your Makeup Brushes
- Frequently Asked Questions
Last Updated: October 3, 2026
Why You Need to Clean Your Makeup Brushes Regularly
Dirty makeup brushes are a breeding ground for bacteria. When you apply makeup with unwashed brushes, you're transferring bacteria, dead skin cells, and old makeup residue directly onto your skin. This buildup can trigger acne, irritation, and infections, especially if you have sensitive skin.
Regular cleaning extends brush lifespan, makeup residue hardens bristles and causes shedding, while clean brushes maintain shape and apply makeup smoothly for years longer.
Clean brushes perform better: clogged bristles can't blend foundation evenly or pick up powder correctly, forcing you to use more product for worse results.
How Often to Wash Makeup Brushes for Optimal Hygiene
Daily-use brushes need deep cleaning every 7-10 days; weekly-use brushes need weekly cleaning.
Spot clean after each use with a quick rinse to remove excess product and reduce bacteria growth between full washes.
Brushes used only a few times monthly need monthly deep cleaning, or immediately if you notice visible residue or stiff bristles.
What You'll Need to Clean Makeup Brushes
You need:
- Lukewarm water
- Gentle cleanser (mild baby shampoo or clarifying shampoo)
- A brush-cleaning mat (optional; helps loosen residue)
- Clean towel or paper towels
- A cup or small bowl
Electric cleaners save time: the Speedy Brush Purifier ($56.00) uses 7000rpm spin speed to clean and dry in seconds; the BrushMaster Pro ($99.99) adds adjustable holders and integrated drying for large collections.

Choosing the Right Cleanser
The cleanser you choose matters. Avoid harsh soaps or detergents, they strip natural oils from bristles and cause shedding.
Mild baby shampoo is the most affordable and effective option. It's gentle enough for delicate synthetic bristles and natural hair brushes alike. A small bottle lasts months.
Clarifying shampoo works well if you have heavy product buildup. It cuts through oil-based products and powder residue more effectively than regular shampoo. Use it once or twice a month for deep cleaning.
Dermatologist-recommended cleansers are ideal if you have sensitive skin. They're formulated to remove bacteria without irritating skin, and they're safe for brushes too.
Avoid:
- Bar soap (too harsh)
- Dish detergent (strips bristles)
- Alcohol-based products (damages synthetic bristles)
Step-by-Step Cleaning Process for Makeup Brushes
There are two distinct cleaning approaches: daily spot-cleaning (removes excess product, reduces bacteria) and weekly deep cleaning (removes embedded residue, sanitizes bristles). Understanding the difference ensures your brushes stay hygienic and perform well.
Deep Cleaning (Weekly or Bi-Weekly)
Deep cleaning removes all makeup residue, bacteria, and oils trapped deep in the bristles. Use this method for your most-used brushes at least once per week.
Step 1: Rinse with lukewarm water Hold your brush under running lukewarm water (90-100°F) with bristles pointing downward so water flows away from the ferrule (the metal part holding bristles).
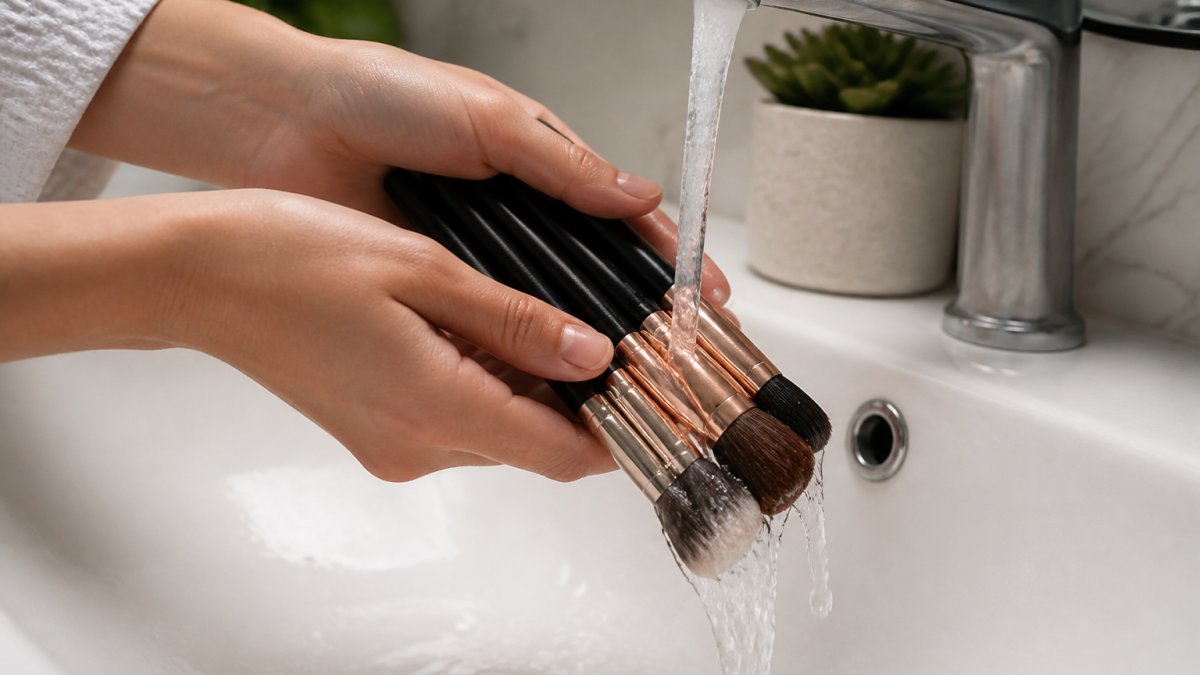
Step 2: Apply cleanser Apply a dime-sized amount of gentle shampoo to wet bristles. Use clarifying shampoo for heavily soiled brushes (foundation, concealer); mild baby shampoo for lighter brushes (eyeshadow, powder).
Step 3: Swirl and lather Swirl on a brush-cleaning mat or in your palm for 30-60 seconds in circular motions, paying special attention to the bristle base where product accumulates.
Step 4: Rinse thoroughly Rinse under lukewarm water with bristles pointing downward until water runs clear (typically 3-5 rinses).
Step 5: Squeeze out excess water Gently squeeze bristles with a clean towel using downward motions. Never wring, twist, or pull, this damages bristles and causes shedding.
Step 6: Reshape and air dry Reshape damp bristles to original form, then lay flat or hang bristles-down to air dry (4-8 hours depending on size and humidity).
Spot Cleaning Between Deep Washes (Daily)
Spot cleaning removes excess product and reduces bacteria between full washes. This quick method takes 2-3 minutes and keeps brushes fresher longer, reducing the need for daily deep cleaning.
Quick spot clean method:
- Spray bristles with brush-cleaning spray or DIY water + one drop shampoo
- Swirl on clean tissue to remove excess product
- Repeat until no product transfers
- Air dry 2-5 minutes
Ideal for daily-use brushes; removes surface product without deep-cleaning time.
Natural vs. Synthetic Bristle Considerations
Natural hair brushes (goat, sable, squirrel) have a slightly rougher texture that grips product well. They're more delicate than synthetics and require gentler handling:
- Use only mild baby shampoo; avoid clarifying shampoo more than once monthly
- Don't scrub aggressively on cleaning mats; use gentle circular motions
- Natural bristles take longer to dry (8-12 hours) due to denser structure
- They're more prone to mold if dried improperly, so ensure complete drying before storage
Synthetic bristles (nylon, taklon) are more durable and can handle slightly more vigorous cleaning:
- Clarifying shampoo works well for heavy product buildup
- Synthetic bristles dry faster (3-6 hours)
- They're less prone to mold but still require proper drying
- Avoid heat exposure; synthetic bristles can warp or melt
Sanitization for Acne-Prone or Sensitive Skin
If you have acne-prone, eczema-prone, or compromised skin, consider a weekly sanitization step beyond standard cleaning:
Vinegar rinse method: After the final rinse in step 4, do one additional rinse with a 1:1 white vinegar and water solution. Vinegar's acidity kills bacteria and fungi without damaging bristles. Rinse thoroughly with plain water afterward to remove the vinegar smell.
Alcohol spray method: After spot cleaning, spray bristles lightly with 70% isopropyl alcohol and let air dry. This sanitizes without deep cleaning. Use only on synthetic bristles; alcohol can damage natural hair bristles.
These sanitization steps are optional for most people but valuable if you're treating active acne or have sensitive skin.
Best Makeup Brush Cleaner Options and Tools
If manual cleaning feels tedious, electric brush cleaners save significant time. They automate the spinning and drying process.
Speedy Brush Purifier, $56.00 The rechargeable design makes this ideal for home or travel use. Its 7000rpm spin speed removes dirt and oil efficiently without harming bristles. Battery lasts for multiple cleaning sessions on a single charge.
BrushMaster Pro Cleaner & Dryer →
BrushMaster Pro Cleaner & Dryer, $99.99 This is the most comprehensive option. It features adjustable holders for different brush sizes, a powerful motor for deep cleaning, and an integrated drying function. If you have a large brush collection or professional needs, this pays for itself through time savings.

Electric Makeup Brush Cleaner, $22.99 An affordable entry point for electric cleaning. It includes a durable nylon handle and works with various brush sets. Best for occasional users or those testing whether electric cleaning fits their routine.
Makeup Brush Automatic Cleaner, $42.00 USB rechargeable with adjustable speed settings for different brush types. Lightweight and portable, making it perfect for travel. Cleans and dries in minutes.
For those preferring manual cleaning, a brush-cleaning mat (typically $10-15) is the only tool you really need beyond supplies you already have at home.
How to Dry Makeup Brushes Properly
Drying is just as important as cleaning. Improper drying leads to bristle damage, mold growth, bacterial buildup, and premature brush failure.
Why ferrule angle matters: The ferrule (metal/plastic band holding bristles) contains water-soluble adhesive.
The 45-degree downward angle method: Lay brushes flat on a clean, lint-free towel with bristles pointing slightly downward at a 45-degree angle.
DIY hanging solutions: Use a tension rod or wooden dowel across a drawer, secure brushes with rubber bands or clips hanging bristles-down, space 2-3 inches apart for air circulation.
Most brushes dry in 4-8 hours at room temperature (65-75°F); natural hair takes 8-12 hours, synthetics 3-6 hours. Humidity adds 2-4 hours. Plan ahead; don't rush.
Reshape while damp: At the 2-3 hour mark, gently reshape bristles to original form to prevent odd angles, clumping, or permanent bends. Reshape only once; repeated handling causes frizz.
Never use heat: Hair dryers, ovens, direct sunlight, or heat lamps damage bristles. Heat causes synthetic bristles to warp, melt, or lose shape permanently. Natural hair becomes brittle and prone to breakage.
Store completely dry brushes bristles-up in a clean cup or holder. Bristles-up storage protects from dust and lets residual moisture evaporate upward rather than settling at the ferrule.
Never store wet or damp brushes in closed containers, sealed bags, or drawers, trapped moisture creates mold and bacteria within 12-24 hours.
Common Mistakes to Avoid When Cleaning Brushes
Mistake 1: Pointing bristles upward while rinsing Water flows into the ferrule and loosens the glue holding bristles. Always point bristles downward when rinsing.
Mistake 2: Using hot water Hot water opens the hair cuticle and causes damage. Lukewarm water is gentler and still effective at removing product.
Mistake 3: Wringing or twisting bristles This causes bristles to bend permanently and shed. Gently squeeze instead.
Mistake 4: Using harsh soaps or detergents These strip natural oils from bristles, causing dryness and breakage. Stick with mild baby shampoo or clarifying shampoo.
Mistake 5: Storing brushes while damp Moisture trapped inside bristles encourages bacterial growth and mold. Always dry completely before storage.
Mistake 6: Cleaning only foundation brushes All brushes, powder, blush, contour, eyeshadow, accumulate bacteria and residue. Don't skip smaller brushes.
Mistake 7: Letting residue buildup for weeks The longer you wait, the harder residue becomes to remove. Weekly cleaning prevents stubborn buildup.
When to Replace Your Makeup Brushes
Even well-maintained brushes eventually wear out. Here's when to replace them:
Bristle shedding: If brushes shed more than a few bristles per use, replacement time is near. Excessive shedding means bristles are loosening from the ferrule.
Bristle damage: Bent, frayed, or permanently splayed bristles can't apply makeup evenly. Reshaping won't fix structural damage.
Bristle integrity loss: If bristles feel rough, stiff, or scratchy despite proper cleaning, the hair or synthetic material has degraded.
Visible wear on the ferrule: Rust, dents, or separation between the ferrule and handle indicate the brush is failing.
Age: High-quality brushes last 2 to 3 years with proper care. Budget brushes may only last 6 to 12 months.
Performance decline: If a brush no longer blends foundation smoothly or picks up powder effectively, it's time to replace it.
A consistent weekly routine to clean makeup brushes takes 10 minutes and prevents acne, irritation, and product waste. Whether you prefer manual cleaning or electric cleaners like the Speedy Brush Purifier or BrushMaster Pro, the key is consistency. Explore premium makeup tools at Cosmetikly to find brushes and cleaning solutions for your routine.
Frequently Asked Questions
Is dish soap safe to use when cleaning makeup brushes?
Gentle, mild cleansers work best for cleaning makeup brushes without damaging bristles. While some people use mild dish soap, dermatologist-recommended options specifically formulated for brushes are safer. Avoid harsh or heavily scented soaps that can strip natural oils from bristles or leave residue. A gentle baby shampoo or dedicated brush cleanser provides better bristle integrity and helps prevent bacterial growth on synthetic and natural hair brushes.
How often should you deep clean versus spot clean your makeup brushes?
Deep clean your makeup brushes weekly if you use them daily, or every two weeks if you use them less frequently. Spot cleaning removes surface makeup residue between deep washes and should be done after each use on heavily used brushes like foundation brushes and powder brushes. Spot cleaning takes just minutes and prevents residue buildup that can harbor acne-causing bacteria and compromise your skin health.
What's the best way to dry makeup brushes to prevent bristle damage?
After rinsing thoroughly, gently squeeze excess water from bristles and reshape them with your fingers. Lay brushes flat or hang them downward at a downward angle on a clean towel or brush-drying mat. Air dry completely in a well-ventilated area away from direct heat or sunlight, which can damage bristles. Never stand brushes upright while wet, as water can seep into the ferrule and loosen bristles. Proper drying preserves bristle integrity and extends brush longevity.
How do I know if my makeup brushes are truly clean and sanitized?
Clean brushes should have no visible makeup residue, and the water running through them should be clear after rinsing. Bristles should feel soft and smooth, not stiff or sticky. If you use an electric cleaner like the Speedy Brush Purifier or BrushMaster Pro, these devices sanitize through spinning action that removes oils and bacteria. For manual cleaning, using a clarifying shampoo or dedicated brush cleanser helps ensure deep cleaning and disinfection, removing makeup residue, dirt, and acne-causing bacteria.